How to Tie Bondage: Step-by-Step Guide for Beginners
Many beginners feel unsure about where to start with rope bondage. Learning how to tie bondage can be safe and fun when done right. This guide breaks down simple steps to build your skills and confidence.
Keep reading for clear instructions and practical tips!
Essential Safety Precautions in Bondage
Boundaries and safety should always be prioritized to ensure a positive experience. Use proper tools and techniques to maintain comfort and avoid harm.
Communication and consent
Open and honest dialogue ensures safe and enjoyable bondage experiences. Both partners must express limits, boundaries, and desires before engaging in BDSM activities. Consent is an ongoing process that requires active participation from all parties involved.
Negotiating beforehand helps reduce risks while building trust and understanding. Studies by the Kinsey Institute reveal that 12% of women and 22% of men respond erotically to BDSM practices, emphasizing the importance of clear agreements.
Consent isn't optional; it's essential for creating trust in intimate play.
Tools for safety (safety shears, first aid kit, etc.)
Safety is a top priority in bondage practices. Having the right tools on hand can prevent accidents and ensure a positive experience.
Keep safety shears nearby to quickly cut ropes in emergencies. They are designed to avoid injuries while cutting close to the skin.
Use a first aid kit for minor injuries like rope burns or abrasions. Include bandages, antiseptic wipes, and medical tape for quick care.
Check circulation frequently by observing color changes or asking about numbness. Loosen ties immediately if any issues arise.
Avoid drugs and alcohol during bondage to maintain focus and clear decision-making. These substances impair judgment and reaction time.
Monitor blood flow around tied areas by pressing lightly on the skin and checking how fast it returns to its normal color.
Keep a clean cloth or towel ready for sweat or discomfort cleanup during prolonged sessions.
Stay alert for any signs of nerve compression, such as tingling sensations or loss of movement in limbs.
Establish a non-verbal safety signal with your partner in case speaking becomes difficult during play.
Prepare an emergency plan before starting, including knowing where keys, shears, and medical tools are kept.
Practical planning helps reduce harm while enhancing your confidence in bondage activities!
Checking circulation and nerve safety
Check circulation by ensuring you can slide two fingers between the rope and skin. Use this “two-finger rule” to avoid ties that are too tight and restrict blood flow. Inspect for signs like pale, cold, or swollen skin around the tied area.
Avoid placing ropes near sensitive areas like knees, elbows, armpits, and the groin to prevent nerve damage. Watch for numbness or tingling sensations in bound limbs. Untie immediately if these symptoms appear.
Never leave a bound person unattended to ensure their safety.
Choosing the Right Rope and Materials
Selecting the correct rope ensures safety and enhances comfort during play. Prioritize quality materials suited for beginners to build confidence in tying techniques.
Types of rope (cotton, jute, hemp, synthetic)
Choosing the right rope is essential for safe and enjoyable bondage. Different rope types offer varying levels of texture, strength, and flexibility.
Cotton ropes are soft and gentle on the skin. They are ideal for beginners due to their flexible and non-abrasive nature.
Jute ropes are made from natural fibers and provide a rougher texture. These ropes are lightweight, durable, and offer good friction for secure ties.
Hemp ropes also feature natural fibers with great durability. They have a softer touch than jute but still maintain excellent grip during use.
Synthetic fiber ropes, like nylon or polyester, are smooth and easy to clean. These options work well for decorative ties due to their vibrant colors and glossy finish.
Natural fiber ropes such as jute or hemp often last longer with proper care. Their durability makes them popular among experienced users.
Ropes designed specifically for bondage often balance strength and flexibility. Always check product details before purchasing any bondage rope for safety assurance.
Rope length plays an important role in tying options. Beginners should start with lengths between 25-30 feet to practice basic knots effectively.
Choosing ropes with suitable thickness ensures comfort during tying sessions. A diameter of 6-8 millimeters works best for most basic techniques while minimizing pressure on the skin.
Friction-resistant ropes like those made from hemp handle tension well without slipping easily during complex ties or harnessing work.
All bondage products require careful selection based on material durability and intended use cases to ensure satisfying results every time.
Rope length and thickness for beginners
Cotton and synthetic ropes often make excellent starting choices. Their smooth texture reduces the risk of skin irritation, making them gentle for beginners exploring basic ties. Beginners should work with rope lengths between 5 to 15 meters depending on the tie.
For a simple Rope Harness (Karada), a standard 10-15 meter length is ideal.
Thicker ropes, like those measuring 6mm or above, ensure more comfort during restraint by distributing pressure evenly across the skin. A thinner option, such as 4mm to 5mm rope, works better for detailed ties but may dig into sensitive areas if used improperly.
Picking hemp or jute ropes offers durability while maintaining flexibility for secure knots in beginner-level bondage techniques.
Basic Knots for Beginners
Mastering basic knots builds a strong foundation for safe and effective bondage. Practice each knot until it feels natural in your hands.
Overhand knot
The overhand knot serves as a fundamental knot in rope tying. It is simple to create and works well for beginners practicing essential knots. To tie it, take the rope and form a loop by crossing one end over the other.
Pull the working end through the loop and tighten it firmly into place.
This basic knot provides good stability when used correctly. Knottying beginners can use it to secure ends of ropes or make loops for various purposes during bondage sessions. Practicing this technique helps build confidence and improves knottying skills.
Square knot
The square knot is one of the most essential knots for beginners. It offers a simple way to tie two rope ends securely. This knot is ideal for creating bindings that stay in place but can still be untied easily if needed.
To make it, cross the right end over and under the left, then reverse by crossing the left end over and under the right.
This basic rope knot works best with materials like cotton or jute ropes due to their flexibility and grip. Use it for temporary ties where safety shears are accessible in case quick removal becomes necessary.
Moving forward, understanding lark's head variations adds more dynamic uses to your skills.
Lark’s head knot variations
Lark’s head knot variations offer flexibility and versatility for beginners learning basic knots. This knot secures the rope to a fixed point or an object like cuffs or furniture.
One variation involves looping the rope through itself to create an adjustable grip, making it ideal for light restraint play. Another option uses double loops for extra stability, which can prevent slipping during movement.
These variations work best with soft ropes like cotton or synthetic materials that minimize friction on skin. Beginners should practice tying these simple patterns to build confidence before progressing to more advanced techniques.
Each variation ensures ease of use while maintaining safety during bondage activities.
Half-hitch knot
After mastering the lark’s head knot variations, move to the half-hitch knot. This simple yet essential rope knot offers versatility for beginners. It acts as a building block in creating more secure ties and ensures stability during bondage play.
To make the half-hitch, form a loop around an anchor point or object. Pull one end of the rope through the loop and tighten it. Repeat this process to create multiple hitches if needed for added security.
Always ensure it stays snug but not overly tight to prevent discomfort or circulation issues.
The Single Column Tie: Your First Bondage Tie
The Single Column Tie is a foundational technique that every beginner should master. It provides a secure yet simple way to bind a single limb or object with ease.
Materials needed
To create a secure single column tie, start with a soft natural fiber rope. Cotton, hemp, or jute ropes work well for beginners due to their smooth texture and flexibility. A length of 8-10 feet ensures enough slack to complete the knot comfortably without excess material getting in the way.
Have safety shears nearby for emergencies. These allow quick removal of restraints if needed. Avoid synthetic ropes as they can cause burns from friction during use. Always check that all tools, including your rope, are clean and free from wear or damage before starting any bondage session.
Step-by-step instructions
The single-column tie is a foundation knot in bondage tying. It is simple, versatile, and works well for beginners learning basic restraint techniques.
Gather an 8-10 foot rope made of cotton, jute, or synthetic material. Ensure the material feels soft and comfortable against the skin.
Fold the rope in half to find the middle point, creating a loop at one end.
Position the loop around the wrist, ankle, or desired limb you want to secure.
Wrap both ends of the rope around the limb once, ensuring even tension but not too tight.
Check that two fingers can fit snugly between the rope and skin to avoid cutting off circulation.
Pull both ends through the loop you created earlier to form a knot anchoring it in place.
Cross the two ends over each other and tie an overhand knot to secure everything tightly but safely.
Test the tie by checking if it stays firm without causing discomfort or pinching.
Communicate with your partner throughout to ensure they remain comfortable while tied up.
Tips for secure and safe tying
Apply the "two-finger rule" to prevent ties from being too tight. This ensures comfort and maintains proper blood circulation. Check for redness, skin discoloration, or numbness during the session to address any signs of restricted blood flow.
Keep safety shears within easy reach for emergencies. Avoid using drugs or alcohol to stay alert and responsive. Never leave a bound person unattended to maintain their well-being throughout the experience.
The Double Column Tie: Tying Two Limbs Together
The double column tie creates secure restraint by binding two limbs together with adjustable tension. This versatile technique allows for both functional and aesthetic applications in bondage.
Adjusting tension for comfort
Using the "two-finger rule" ensures restraints are snug but not too tight. By sliding two fingers between the rope and skin, one can confirm proper tension to maintain comfort and safety.
Always monitor circulation by checking for color changes or numbness in tied areas. Loosening knots or adjusting pressure prevents discomfort during consensual sensory play with bondage ropes or other restraints.
Simple Rope Harness Techniques
Learn how to create captivating rope patterns that accentuate the body. Mastering these techniques adds comfort and visual appeal to your bondage play.
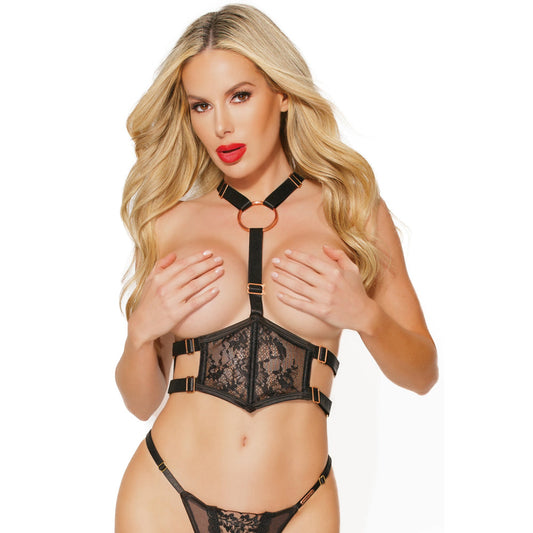
Chest harness
A chest harness, often called a Karada, is both functional and decorative in rope bondage. It uses 10-15 meters of rope to create a web-like lattice pattern across the torso. This technique distributes pressure evenly while enhancing aesthetic appeal.
Beginners can start with basic wraps that frame the chest securely without causing discomfort.
The Shinju method emphasizes ropes above, below, and between the breasts for added detail and support. Shibari enthusiasts value this style for its balance of beauty and restraint.
Always monitor tension to ensure comfort and safety during use.
Waist and torso harness
Transitioning from the chest harness, a waist and torso harness provides more coverage and support during rope bondage. This body harness technique uses longer ropes, typically 10-15 meters, to create both functional restraint and decorative designs.
It extends from the waist to the upper torso with secure loops that balance tension while avoiding discomfort.
Rope bondage enthusiasts frequently use this method in Shibari or Kinbaku practices due to its flexibility and striking patterns. Beginners should focus on simple yet effective knots like single-column ties as they build confidence.
Always check for circulation regularly to maintain safety during rope play sessions.
Ties for the Upper Body
Upper body ties provide support and create visually striking patterns. These techniques enhance both function and aesthetic appeal in bondage play.
Box tie
The box tie, also called Gote Shibari in Japanese rope bondage, secures the arms behind the back in a square position. This upper body tie is widely used by riggers because of its balance between restraint and aesthetic appeal.
Use high-quality rope such as jute or hemp for flexibility and durability. Ensure safety by applying the two-finger rule to check that circulation isn’t restricted. Start by wrapping the rope around both arms at shoulder level, maintaining even tension throughout the process.
Adjust carefully to avoid nerve compression while keeping the knots secure but comfortable for your partner’s experience.
Reverse prayer tie
The reverse prayer tie restrains the arms behind the back with palms pressed together, mimicking a praying position. This upper body bondage technique prioritizes trust and communication to ensure safety throughout the process.
Start by creating two single-column ties around each wrist, leaving enough rope for adjustments. Carefully guide the arms into position behind the back, ensuring comfort and avoiding strain on joints.
Use additional rope to secure both wrists while maintaining slack for circulation. Check tightness using the two-finger rule and monitor your partner's feedback consistently during use.
Breast bondage techniques
Breast bondage techniques create beautiful patterns while restraining the upper body. For example, the Shinju rope art involves wrapping ropes above, below, and between the breasts to form a secure yet decorative structure.
Beginners can build on foundational ties like single-column and double-column knots before moving into more intricate designs.
Use soft ropes such as cotton or hemp for comfort and ensure proper tension by applying the two-finger rule to avoid circulation issues. These methods work best for individuals with C cups or larger but adjust placement based on personal comfort and anatomy.
Ties for the Lower Body
Ties for the lower body offer creative ways to enhance restraint play and explore new positions. These techniques balance functionality with comfort, ensuring both partners enjoy the experience safely.
Frogtie
A frogtie involves bending the legs at the knees and securing them to resemble a crouched frog stance. This simple yet effective rope bondage technique can enhance intimacy and sensory play.
Start by mastering foundational knots such as the single-column tie or double-column tie, which provide stability for this position. Use soft ropes like cotton or jute for added comfort, ensuring they are not too tight by applying the "two-finger rule.".
Keep communication open throughout to ensure trust and consent. Check circulation frequently to prevent discomfort or nerve issues during restraint techniques. Frogties work well with additional lower-body ties, making them versatile for creating personalized experiences.
Continue exploring combinations of basic knots in similar positions under “Crotch Rope.”.
Crotch rope applies pressure to sensitive areas, making it a popular choice for erotic rope tying. This technique works well in tease and denial scenarios, offering both pleasure and control during intimate sessions.
It can be adapted for men and women, making it versatile for various preferences.
Using the two-finger rule ensures the rope stays snug without being overly restrictive. Single-column or double-column ties often form its foundation, providing stability and comfort.
Always use soft materials like cotton or hemp to avoid discomfort or irritation on delicate skin.
Lotus position tie
Shifting from crotch rope techniques, the lotus position tie focuses on securing the lower body in a cross-legged posture. This sitting tie mirrors poses often seen in yoga or meditation, offering both comfort and flexibility during bondage play.
Start by using a soft, natural rope like cotton to avoid discomfort against sensitive skin. Gently guide your partner into a comfortable seated position with legs crossed. Wrap the rope around both ankles and under their thighs to anchor the position securely while distributing tension evenly.
Adjust for proper circulation to ensure safety while maintaining relaxation throughout this lower body tie.
Head Bondage Techniques
Explore head bondage techniques to create unique, visually appealing designs while maintaining comfort and safety.
Basic head harness
The basic head harness involves tying ropes around the head for restraint or decorative purposes. It often incorporates tools like gags, collars, blindfolds, or other head bondage gear to enhance sensory play and control.
Start by ensuring clear communication between partners about comfort levels and boundaries before beginning any techniques. Always check circulation using the "two-finger rule" to ensure there’s no excessive tightness.
Practicing single-column ties provides a solid foundation for creating secure yet comfortable knots on the head area. Opt for soft rope materials such as cotton or hemp to avoid irritation during prolonged use.
Consider adding simple patterns or loops to make the setup visually appealing while maintaining safety as a priority. Moving forward, explore more intricate upper-body ties paired with this style for added complexity in your sessions.
Adding decorative elements
Transitioning from basic head harness techniques, adding decorative elements can transform bondage into artistic expression. Utilizing ornamental bondage designs like the Heartbreak Karada offers a harmonious mix of beauty and restraint.
Through aesthetic ropework techniques, individuals can create intricate patterns that emphasize stylistic details while maintaining secure ties.
Emphasize creative bondage by combining foundational knots such as the single-column or double-column tie with decorative knotting methods. Prioritize safety by applying the two-finger rule to avoid overly tight ropes, ensuring circulation and comfort.
Decorative restraint techniques enhance visuals while fostering trust through clear communication and purpose in every tie.
Tying to Anchor Points
Discover safe and creative ways to secure ties to stable anchor points for enhanced restraint play.
Spread eagle tie
A spread eagle tie secures all four limbs, creating a fully restrained position. This technique can be performed horizontally on a bed, vertically against a wall, or upside down for advanced setups.
Start with single-column and double-column ties to bind each wrist and ankle securely before attaching them to anchor points. Use sturdy furniture, posts, or beams as anchors for stability.
Maintain comfort by applying the two-finger rule to ensure the rope isn’t too tight around the limbs. Keep safety shears nearby in case of emergencies during restraint play. Test circulation frequently by checking skin color and warmth at each bound area.
X-cross tie
An X-cross tie secures a person to an anchor point in the shape of an "X." Use strong ropes that can handle weight and tension safely. Choose cotton or hemp for comfort, as they are soft on the skin.
Start by attaching each limb to its own anchor point, such as bedposts or a sturdy frame. Ensure even spacing between connection points for proper balance.
Adjust rope tension carefully. Leave enough slack so circulation remains unrestricted but tight enough for stability. Always check knots during and after tying to ensure they hold securely without slipping.
Safety shears should remain nearby for emergencies or quick release if needed.
Using bondage furniture
Bondage furniture, like restraint furniture or dungeon furniture, enhances comfort and creativity during tying sessions. Pieces such as sex chairs, submission benches, or X-crosses provide secure anchor points for various ties.
These sturdy pieces of BDSM equipment reduce strain on the body while maintaining positions longer and with greater ease.
Kinky furniture offers versatility for exploring different bondage techniques. A spread eagle tie works well with a flat adult bed frame or table designed for restraints. Tiedown corners on fetish furniture allow quick adjustments while ensuring safety and stability during use.
Suspension bondage requires careful preparation and a strong understanding of safety principles to avoid injuries. Start with partial suspensions to build confidence before attempting more advanced techniques.
Setting up anchor points safely
Choose anchor points that can handle the weight and tension of suspension bondage. Use secure structures like ceiling beams, professionally installed suspension rigs, or specialized bondage furniture.
Avoid furniture or fixtures not designed to bear weight safely.
Distribute body weight evenly by using proper rigging techniques and rope placement. Double-check knots for strength and stability before applying any tension. Always keep safety shears nearby in case you need a quick release during an emergency.
Continue practicing with partial suspensions before attempting full ones for added safety measures.
Partial vs. full suspension
Partial suspension supports part of the body weight while keeping other parts grounded. This method offers more control and reduces stress on the ropes, making it ideal for beginners exploring suspension bondage.
For example, suspending the legs or arms allows easier adjustments to rope tension and ensures safety during practice. Using a safety harness helps maintain proper body positioning without causing discomfort.
Full suspension lifts the entire body off the ground and requires advanced skills with strict safety precautions. Improper tying can lead to suspension trauma, which might include dizziness or fainting due to restricted circulation.
Applying the two-finger rule prevents ropes from being too tight around limbs. Ensuring secure anchor points and monitoring your partner's comfort minimizes risks during full-body weight support positions.
Common Mistakes to Avoid in Bondage
Rushing through a tie can compromise safety and comfort. Always stay attentive to your partner's physical and emotional responses during play.
Applying too much tension
Applying too much tension during rope play can cause discomfort, bruising, or restricted blood flow. Beginners should always use the "two-finger rule." This ensures that at least two fingers can comfortably slide between the rope and skin.
Tight knots may feel secure but could harm circulation.
Watch for signs of numbness or discoloration in bound areas. Safety shears should always be nearby to release bindings quickly if needed. Proper pressure allows your partner to enjoy restraint without pain or risk as you move into discussing comfort adjustments using techniques like double column ties.
Ignoring body language and feedback
Ignoring body language and feedback can lead to discomfort or harm during bondage. Partners must pay close attention to nonverbal communication, like facial expressions or shifts in posture.
Tight ropes causing pain should be adjusted immediately using the "two-finger rule" for proper tension. Supervision is critical; never leave a bound person unattended.
Substances like alcohol or drugs impair judgment and hinder reading cues effectively. Trustworthiness grows through clear consent and active listening to verbal and physical feedback.
Prioritizing these steps ensures safety, enhances comfort, and builds stronger connections between partners.
Aftercare: Taking Care of Your Partner Post-Bondage
After a bondage session, provide soothing care to help your partner relax. Offer gentle attention and assess their physical comfort thoroughly.
Checking for marks or injuries
Inspect the skin for any physical marks, such as redness, bruises, or abrasions. Focus on areas where rope made contact to ensure no signs of irritation or injury appear. Use the “two-finger rule” during tying to prevent excessive tension that can harm circulation.
Stay attentive to changes in body language or discomfort your partner might express. Prioritize communication and trust by asking how they feel throughout and afterward. Never leave a restrained individual alone, ensuring their safety at all times.
Providing comfort and hydration
Offer water or a favorite drink to ensure proper hydration after bondage. Check for any physical discomfort, such as tightness or marks from the ropes. Use the two-finger rule to confirm that no area has been bound too tightly.
Provide emotional support by maintaining consistent communication and trust throughout postbondage care. Never leave a bound individual alone during this time, ensuring their safety and wellbeing remain top priorities.
Exploring Beyond the Basics
Experiment with advanced methods to enhance creativity and connection. Challenge your skills by combining intricate ties or exploring decorative styles.
Decorative Shibari techniques
Decorative Shibari techniques transform functional knots into artistic ropework. Advanced skills like the CHC Harness and Coin Chain Shelf Bra showcase intricate patterns while remaining secure and comfortable.
Such exquisite rope patterns enhance both aesthetic appeal and intimacy, blending creativity with technique.
Creative ropework starts with foundational ties such as single-column or double-column ties. These basics evolve into ornamental designs that highlight Shibari art's elegance. Materials like cotton or jute ropes add texture, making each piece of artistic bondage visually striking yet gentle on the skin.
Combining ties for complex positions
Combining ties like the single-column and double-column opens doors to intricate bondage positions. These advanced restraint techniques can include blending a chest harness with lower body ties, such as frogties or lotus positions, for detailed configurations.
Using elaborate rope tying methods allows for versatile arrangements that highlight creativity while ensuring comfort and safety.
Pairing decorative Shibari techniques with complex rope positions creates sophisticated results that elevate the experience. Users can explore complicated tie configurations by securing anchor points or integrating head bondage into full-body restraints.
Every step builds on trust, communication, and proper tools to achieve safe yet stunning designs.
Conclusion
Discover the endless possibilities of rope bondage by experimenting with new techniques and materials. Explore deeper connections through creativity, trust, and shared experiences.
[Exploring Bondage Rope and Tape Options](https://www.fantasiesboutique.com/collections/bondage-rope-tape)
TheDuchy offers a wide variety of bondage rope and tape to suit different preferences. Cotton ropes provide softness, while jute and hemp deliver a natural feel with more texture. Synthetic options like nylon ensure durability and are beginner-friendly due to their smoothness.
Each material caters to unique bondage techniques, making it easy for users to find the perfect fit.
Proper selection of materials ensures both safety and comfort during use. Beginners may prefer thinner ropes around 6mm in thickness for easier handling, while experienced users might explore thicker or longer variations.
For added convenience, customers can purchase high-quality BDSM equipment from TheDuchy’s collection directly online.
FAQs
1. What is bondage, and why is it important to learn proper techniques?
Bondage is the act of tying or restraining someone for consensual purposes, often in intimacy or art. Learning proper techniques ensures safety, comfort, and enhances trust between partners.
2. What materials are best for beginners when tying bondage?
Soft ropes made from cotton or hemp are ideal for beginners. They are gentle on the skin and easy to handle while practicing basic knots.
3. How can I ensure safety while trying bondage as a beginner?
Always communicate with your partner about boundaries and use clear signals like a safe word. Avoid tying too tightly or restricting blood flow by checking circulation regularly.
4. Are there specific knots recommended for beginners in bondage?
Yes, simple knots like single-column ties and double-column ties are great starting points. These provide secure holds without being overly complex to master at first.