


Many beginners feel overwhelmed learning how to tie BDSM knots safely and effectively. Rope bondage is an exciting form of intimacy that combines creativity, trust, and technique. This guide breaks down essential tools, safety tips, and beginner-friendly knots to make things easier for you.
Start exploring the basics today!
Essential Tools for Rope Bondage
Every bondage experience begins with the right tools. Choosing quality materials ensures both safety and comfort during rope play.
Types of Rope Used in Bondage
Bondage rope comes in various materials suited for different purposes. Hemp and jute ropes are popular due to their strength and natural texture. These types are often friction-treated to ensure they glide smoothly over the skin without causing burns.
Shibari enthusiasts frequently use these ropes because of their flexibility and aesthetic appeal.
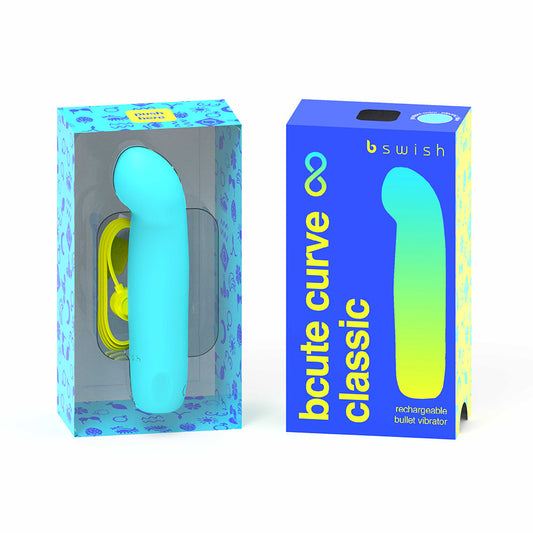
Synthetic ropes like nylon or cotton are softer alternatives, making them ideal for beginners exploring restraint techniques. The standard length of bondage rope ranges from 10-15 meters, perfect for ties such as rope harnesses or chest bindings.
For specific designs like Shinju breast bondage, a 14-inch rope works best when accommodating larger body sizes.
The right rope enhances both function and comfort during play.
Learn about safety tools next to create a secure experience with every tie!
Safety Scissors and Emergency Tools
Protective scissors or emergency shears stand as a must-have for rope bondage safety. These tools cut ropes quickly in case of nerve injury, circulation issues, or other emergencies.
Dull-tipped scissors reduce risks of cutting the skin during removal. Always keep them within arm’s reach for immediate access.
Nerve injury prevention starts with preparation. Common vulnerable areas include the radial nerve on arms and lateral femoral cutaneous nerve on legs. Emergency cutting tools act as a lifeline if discomfort or numbness occurs.
Prioritize these essential safety measures to ensure safe and enjoyable experiences during play sessions.
**Choosing the Right Bondage Rope and Tape**
Selecting the right bondage rope and tape is crucial for safe and enjoyable play. Hemp ropes, like those from Twisted Monk, are a popular choice due to their durability and grip. Many prefer hemp or jute as they provide good friction while remaining soft after proper treatment.
For beginners, cotton ropes work well since they are gentle on the skin.
Bondage tape offers another versatile option. This self-adhesive material sticks only to itself, preventing discomfort or damage to hair and skin. It’s perfect for quick restraints or sensory play without complicated knots.
Beginners should keep both options in their kit for flexibility during sessions.
Key Safety Precautions
Always prioritize safety before starting any rope bondage activity. Understand proper techniques to ensure comfort and avoid injury.
Communication and Consent
Clear communication ensures safe and enjoyable BDSM experiences. Partners should discuss boundaries, desires, and limits openly before engaging in rope bondage. Consent must be informed, specific, and enthusiastic at all times.
Using negotiation tactics helps both parties establish trust while agreeing on safety protocols and expectations. Setting a "safe word" provides an immediate way to pause or stop activities.
Consent education is essential for preventing misunderstandings or unnecessary risks. Trust building requires open dialogue about personal safety awareness, risk management strategies, and conflict resolution plans.
As one expert emphasizes:.
Without consent and clear communication, there is no true BDSM—only harm.
Checking Circulation and Nerve Safety
After establishing clear consent and open communication, focus shifts to ensuring physical safety. Rope bondage can pose risks such as impaired circulation, nerve compression, or vascular compromise if done improperly.
Regularly check for restricted blood flow by monitoring skin color and warmth in tied areas. Pale or cold skin may signal ischemia or other blood flow issues.
Avoid tying over common vulnerable nerve zones like the radial nerve on the arm or the lateral femoral cutaneous nerve on the thigh. These areas are prone to nerve compression that might lead to paresthesia or long-term neurological impairment.
Keep ties secure but not overly tight—allow space for two fingers under ropes to maintain safe pressure levels during play.
Safe Areas for Rope Placement
Ensuring rope placement on safe areas of the body helps prevent nerve damage and restricts blood flow. Avoid tying ropes around joints like elbows or knees, as these contain sensitive nerves and blood vessels.
Focus on fleshy parts such as thighs, upper arms, or hips for secure restraint without compression risks.
Adapting ties based on body type promotes safety during bondage. Heavier builds may need looser knots to maintain circulation, while thinner individuals should avoid direct pressure over bony areas.
Always check for discomfort or tingling sensations to ensure proper placement while prioritizing bondage safety precautions.
Basic Knots for Beginners
Mastering simple knots builds confidence and lays the foundation for exploring rope bondage further.
Single Column Tie
The single column tie is a foundational knot in rope bondage. It keeps one limb or object securely tied without slipping. Beginners can learn this technique quickly, as it takes only 20-30 seconds to complete when using the Burlington Bowline variation.
This method is stable and reliable, making it an ideal starting point for those new to restraint or Shibari-style rope work.
This tie works well for binding wrists or ankles during basic bondage positions. Start by creating a loop around the chosen body part, ensuring comfort and safety. Maintain steady tension while tying to avoid circulation issues.
Mastering this knot helps set the stage for learning more advanced bondage techniques later on.
Double Column Tie
The double column tie binds two body parts together, such as wrists or ankles. This knot works well for restraint and supports various bondage positions like the frogtie or shrimp tie.
Its adjustable tension allows users to control restriction levels easily. Beginners often start with this knot due to its simplicity and versatility in rope bondage.
This technique keeps safety at the forefront by focusing on circulation and proper rope placement. Variations of this tie can connect limbs to fixed points, making it ideal for setups like spread eagle positions.
It also integrates into decorative patterns or complex designs, adding style while maintaining function.
Overhand Knot
The overhand knot serves as a cornerstone in rope bondage. It allows beginners to secure ropes effectively, making it essential for safe practices. This basic knot can create sturdy connections for various BDSM ties, including breast bondage and crotch ropes.
Its simplicity ensures minimal risk of slipping when tied correctly.
This versatile knot enhances intricate patterns, such as diamond-shaped rope harnesses. It also supports more advanced setups like strappado or predicament arrangements. Mastering this knot is key to building confidence and creating reliable restraint systems in bondage play.
Square Knot
Transitioning from the Overhand Knot, the Square Knot is another essential tie for bondage beginners. It helps secure two rope ends together and provides stability during play. This basic knot distributes pressure evenly, ensuring comfort and safety for your partner.
Its simple structure makes it easy to untie quickly if needed in an emergency.
To create a Square Knot, cross one rope end over the other like you’re starting to tie a shoe. Reverse the direction on the second loop before pulling tight. This method creates a secure hold that stays in place but can be released effortlessly after use.
Mastering this knot builds confidence for more advanced techniques in BDSM practices.
Lark’s Head Knot
The Lark’s Head knot serves as a foundational technique in BDSM. This simple knot attaches the rope securely to an anchor, like cuffs or rings, and provides stability. Beginners often use it as a starting point due to its quick setup and ease of learning.
To tie this knot, fold the rope in half, create a loop at the center, and pull both loose ends through that loop around your chosen object.
While effective for securing rope to anchors, this knot is not recommended for direct bondage on sensitive areas. It can tighten under tension, causing discomfort or circulation issues.
Always start with one end of the rope and ensure enough slack for adjustments. Prioritize comfort by monitoring pressure points closely during play sessions.
Beginner-Friendly Bondage Positions
Explore simple and enticing rope techniques that enhance intimacy and spark creativity in playful restraint.
Wrists Behind Back (Single Column)
The wrists behind back position using a single column tie is simple and secure for beginners. This foundational restraint offers stability while keeping bondage safe and functional.
The Burlington Bowline is an excellent knot for this, taking only 20-30 seconds to tie properly. It ensures the rope stays firmly in place without tightening further during use.
Start by wrapping the rope around both wrists, ensuring it sits comfortably on the skin. Avoid tying too tight or placing pressure near nerves or joints. Use smooth tension while fastening the ends securely with your chosen knot.
This technique allows for proper restraint without causing discomfort or restricting blood flow excessively.
Ankle Restraints (Double Column)
Ankle restraints using the double column tie are perfect for limiting movement while keeping some flexibility. This method binds both ankles together, allowing controlled opening and closing of the legs.
It’s a popular choice for beginner-friendly bondage positions due to its simplicity and versatility.
The Shrimp Tie, or Ebi, ties ankles in a seated cross-legged position, creating a secure but comfortable hold. The Reverse Shrimp Tie brings the ankles closer to the buttocks for an intense Japanese hogtie effect.
For added variety, try incorporating this tie into frogtie positions that bind both knees and ankles, resulting in a crouched stance ideal for exploring bound-leg scenarios.
Frogtie for Legs
The frogtie for legs secures the knees and ankles, creating a crouched or bent position. This allows controlled movement and serves as a beginner-friendly introduction to leg bondage techniques.
Tethering the wrists can transition this into more restrictive positions, while still maintaining safety. Rope placement focuses on providing comfort while restricting mobility effectively.
Legs can be tied closer together in the “virgin position” or spread apart in the “slut position.” Submissives may remain seated, kneel, or even stand depending on their preference and flexibility.
Adding crotch ropes or extra ties enhances restriction for those seeking increased intensity within their BDSM experience.
Simple Chest Harness
A simple chest harness focuses on comfort and support, making it beginner-friendly. Use a rope around 10-15 meters long to create this design. This length ensures enough rope for secure loops and knots across the upper body.
Start by wrapping the rope under the bustline, creating two parallel bands that encircle the chest. Keep tension even but not overly tight to maintain circulation.
Cross the ropes behind the back, bringing them forward above or below previously created lines. Adjust placement based on desired aesthetics or fit while keeping safety in mind. Incorporating techniques like these allows users to enjoy restraint play safely and sensually, enriching their experience with shibari art and erotic knots designed for beginners.
Intermediate Bondage Knots and Techniques
Mastering intermediate knots improves both creativity and control in rope play. Focus on knots that enhance comfort while maintaining secure restraints.
Half-Hitch Knot
The half-hitch knot stands out as a vital element in rope bondage. This technique ensures load-bearing stability, making it suitable for full-body ties and harnesses like chest or hip restraints.
Its versatility allows users to adapt it to different body types and partner needs while maintaining safety during use. Properly executed, the half-hitch offers secure tension without cutting off circulation.
Applying the half-hitch requires precision to prevent slipping or tightening unexpectedly under pressure. Using soft yet durable ropes reduces risks of discomfort or injury, especially near sensitive areas.
Always prioritize communication and consent before incorporating this knot into bondage techniques to meet both partners' comfort levels effectively.
Quick-Release Knots
Quick-release knots provide both safety and convenience in intermediate bondage. The Burlington Bowline and Cat’s Paw Single Column are two effective examples often used for their reliability.
These knots allow for swift untying, ensuring that participants can release tension or reposition ropes quickly when needed. Proper organization of rope ends simplifies tying these knots while ensuring smooth functionality.
Body area placement plays a significant role in the success of quick-release bondage ties. Avoid sensitive areas like joints to prevent injury, focusing instead on safer zones such as wrists or ankles.
Effective communication enhances trust, making it easier to implement these techniques confidently while respecting boundaries.
Rope Tension and Placement
Rope tension plays a critical role in ensuring safety and comfort during bondage. Tying ropes too tightly can restrict blood flow, increase the risk of nerve damage, and cause discomfort.
On the other hand, loose ropes may fail to provide adequate restraint or structure. Striking the right balance is essential to avoid risks like circulation issues or potential asphyxiation.
Regularly check for signs of restricted blood flow, such as discoloration or tingling.
Safe rope placement minimizes strain on sensitive areas like joints, necks, and inner thighs. Areas with thick muscle masses, like arms and upper legs, make better spots for securing ties.
Adapt techniques based on body type to ensure equal pressure distribution while preventing injury. Always keep a pair of safety scissors nearby for emergencies if adjustments are needed quickly during play sessions.
Tying Upper Body Restraints
Learn techniques to create secure and comfortable upper body restraints while exploring creative ways to enhance intimate connections.
Box Tie
A box tie, also known as Gote Shibari, is a classic upper body restraint in Japanese rope bondage. It secures the arms behind the back while wrapping around the chest for support and balance.
This technique focuses on both aesthetics and functionality, making it a favorite in Kinbaku practices. Beginners should start with soft ropes like jute or hemp to ensure comfort and safety during play.
Proper execution requires attention to circulation and nerve areas, particularly underarms and wrists. The design evenly distributes tension across the chest, reducing discomfort. Always keep communication open between participants to ensure their well-being throughout the session.
Breast Bondage Techniques
The Shinju breast bondage technique uses a 14-inch rope, ribbon, or leather straps to create a supportive and decorative harness around the chest. This method works best for individuals with a C cup or larger and provides both aesthetic appeal and restraint functionality.
It evenly distributes pressure while keeping circulation in mind.
Rope bondage for breasts can also include variations like double loops or figure-eight patterns to enhance design complexity. Beginners should practice proper tension to avoid discomfort or restricted breathing.
Transitioning from basic ties into combining breast binding methods with upper body restraints allows exploration of advanced techniques like the box tie in the next section.
Reverse Prayer
Tying a Reverse Prayer builds on techniques like breast bondage, focusing heavily on arm and shoulder positioning. This restraint involves binding the arms behind the back while pressing the palms together as if in prayer.
It restricts mobility significantly and often pairs with other ties for full upper-body immobilization.
Extended sessions using this position can lead to discomfort or cramps, particularly around shoulders and elbows. Safety precautions are critical to avoid nerve damage or pain during use.
Some enthusiasts add ropes connecting from wrists to chest ties for added restriction, blending it with breast bondage elements seamlessly. This tie also resembles certain yoga poses but requires constant monitoring in bondage settings to ensure comfort and safety at all times.
Tying Lower Body Restraints
Lower body restraints enhance intimacy and create unique sensations during rope play. Mastering these ties allows for greater creativity in positioning and control.
Crotch Rope
Crotch rope creates targeted pressure by tying knots with either a single line or two lines along the genitals. It can function as an informal chastity belt and is often used in BDSM scenes involving female submissives.
This restraint works over clothing or on bare skin but prioritizes hygiene to prevent infections.
Common materials include hemp, jute, or webbing due to their durability and softness against the skin. The frogtie position enhances this technique by binding legs at the knees and ankles in a crouched stance.
Positions like the "virgin position" (legs together) or "slut position" (legs apart) further customize this type of lower body restraint for different aesthetic goals or sensations.
Lotus Position for Legs
The lotus position for legs involves crossing them comfortably while securing thigh and ankle restraints. This position creates stability, making it ideal for various bondage techniques or prolonged scenes.
It allows easier access to the lower body without excessive strain if flexibility and comfort are maintained.
Participants should ensure proper circulation by regularly monitoring any signs of numbness or discomfort. Communication and consent remain vital at every step to maintain safety and trust during use.
Using soft ropes or padded restraints can reduce pressure on joints, enhancing comfort over time.
Hip and Waist Ties
Hip and waist ties add support and aesthetic appeal to lower body bondage techniques. Using 10-15 meter ropes is ideal for creating intricate rope harnesses or restraint tying styles that encircle the hips and waist securely.
These ties provide stability while allowing room for creativity with knots and patterns, making them suitable for beginners and intermediates alike.
Tying techniques within this category focus on comfort, avoiding pressure points, and ensuring proper circulation. Many prefer starting with a simple hip harness before experimenting with more advanced designs like combining crotch rope elements or attaching lines to fixed points.
Transitioning from hip ties to full-body restraints opens opportunities for diverse positions while maintaining safety considerations.
Anchoring to Fixed Points
Secure ropes to stable objects for enhanced restraint. Use sturdy fixtures to ensure safety and maintain control during play.
Spread Eagle Position
The spread eagle position secures a submissive face up with arms and legs restrained. Limbs stretch out toward anchor points, creating a vulnerable posture that gives the dominant full access to the front.
Performing this can involve horizontal setups on beds or tables, vertical orientations like a standing spread or even upside-down configurations. Restraints may remain snug for less movement or loosened slightly for comfort.
Bondage equipment such as St. Andrew’s crosses or spreader bars enhances this position by providing fixed anchor points. Adjustable straps also work well with ordinary furniture like bedposts or doors to adapt at home.
Proper safety measures are key to prevent circulation issues and minimize discomfort from prolonged restraint periods—prioritizing safety tools ensures smooth transitions into X-Cross Bondage techniques.
X-Cross Bondage
X-Cross bondage uses bondage equipment like St. Andrew’s crosses or spreader bars to restrain individuals in a stretched position. Bondage furniture is often built with anchor points, ensuring security and stability for the restraints.
This method highlights vulnerability, which can add to feelings of trust or controlled humiliation within BDSM play.
Restraint kits allow standard furniture to adapt for X-Cross positions without specialized gear. Strappado bondage—binding arms behind the back and raising them—pairs well with this technique but requires caution due to risks.
Overuse of head bondage equipment may apply excessive pressure, so constant monitoring is critical to ensure safety and comfort during this activity.
Using Bondage Furniture (e.g., St. Andrew’s Cross)
A St. Andrew’s Cross allows secure anchoring points for restraints, tethers, and shackles. This iconic piece of fetish furniture typically features an X-shaped frame made of sturdy materials like wood or metal.
Many models come equipped with adjustable cuffs or loops to attach ropes, chains, or suspension equipment with ease.
This bondage furniture enhances dominance and submission scenarios by keeping the body exposed and immobilized. Bondage enthusiasts can pair it with harnesses, erotic restraints, or dungeon equipment for added versatility.
Always ensure proper positioning to avoid strain on joints while adapting ties for individual body types to prioritize safety during play sessions.
Introduction to Suspension Techniques
Suspension techniques offer advanced opportunities for creative rope play, enhancing both visual appeal and sensual experiences.
Basics of Suspension Safety
Suspension safety requires careful preparation to avoid injuries such as suspension trauma, nerve damage, or blood flow restriction. A properly fitted body harness is essential for distributing weight evenly and reducing pressure on sensitive areas.
Regular inspection of the harness ensures no tears, frays, or faulty buckles compromise safety during use.
Fall protection measures must always be in place to prevent accidents. A suspension system should include a rescue plan in case of emergencies, such as fainting or dizziness caused by hanging positions.
Suspension training helps participants understand techniques and reduce risks while ensuring confidence with equipment like fall arrest systems and safety harnesses.
Simple Suspension Knots
Simple suspension knots play a crucial role in partial and full suspension bondage. They provide the necessary support to hold body weight while balancing comfort and safety. Tying these knots correctly ensures stability, reduces discomfort, and protects against nerve damage.
Common examples include the Alpine Butterfly Knot and the Figure 8 Knot, both known for their strength under tension.
Use strong, durable rope designed specifically for rigging or Shibari to secure suspendable devices safely. Properly placed supportive ties prevent strain on sensitive areas like joints or thin skin.
Combine clear communication with regular checks of circulation during use to ensure a safe experience with restraint techniques.
Aftercare for Rope Bondage
Proper aftercare soothes the body and nurtures emotional well-being, enhancing trust and connection. Explore effective tips to elevate your experience.
Physical Aftercare for Skin and Muscles
Gently massage the skin and muscles to improve blood flow after rope bondage. Use a warm compress on areas that appear red or irritated. This helps reduce swelling and soothes tender spots.
Stretching tight muscles is also beneficial for preventing stiffness.
Check nerve-sensitive areas like the radial nerve in the arm or lateral femoral cutaneous nerve in the leg for any signs of numbness or tingling. Apply aloe vera gel or a mild moisturizer if there are rope marks to promote healing.
Encourage hydration to aid muscle recovery after prolonged restraint sessions.
Emotional Aftercare and Communication
Open communication builds trust after rope play. Partners should discuss their experiences, emotions, and comfort levels to ensure psychological wellbeing. Emotional support fosters intimacy and helps address any lingering feelings or concerns from the session.
Effective communication in BDSM strengthens connections and prioritizes consent.
Aftercare for rope bondage includes checking emotional needs alongside physical ones. Many people feel vulnerable post-scene due to heightened sensations or an erotic response to BDSM activities, as reported by 12% of women and 22% of men according to the Kinsey Institute.
Providing reassurance ensures a safe emotional environment for both partners.
Conclusion
Learning how to tie BDSM knots can open doors to deeper connection and trust. With practice and clear communication, partners can explore new levels of intimacy safely. Start with simple ties, focus on safety, and enjoy the shared experience.
Bondage is about creating pleasure through consent and creativity.
FAQs
1. What is BDSM bondage, and why are knots important?
BDSM bondage involves tying or restraining a partner for consensual exploration of trust and intimacy. Knots are essential for safety, control, and ensuring the ties stay secure without causing harm.
2. What are some beginner-friendly knots to learn for bondage?
Beginner-friendly knots include the single column tie, double column tie, and square knot. These knots are simple to learn and safe when used correctly.
3. How can I ensure safety while tying BDSM knots?
Always communicate with your partner about comfort levels. Avoid restricting blood flow or breathing by keeping ties loose enough to fit two fingers under them. Have scissors nearby in case you need to cut the rope quickly.
4. What type of rope should beginners use for bondage?
Use soft ropes like cotton or hemp that feel gentle on the skin but hold firm when tied securely. Avoid rough materials that may cause irritation or injury during playtime sessions.